Quickstarting OE
Contents
Background
Amazon offers pay-as-you-use cloud servers. You can attach disks to virtual machines just like you would a physical machine. Disk images can be shared between users, and they are identified by a code known as an "AMI" (Amazon Machine Image).
Chumby has pre-built an OE image, so that all of the packages are resident and built, thus allowing you to get started on developing your application right away, without having to spend hours configuring and downloading the source code for the entire universe. You can use these AMIs as a starting point for development; and if you mess up, you can always restart the instance from a fresh image again (but back up your changes before you do that!).
Amazon offers several tiers of machines, with varying prices (http://aws.amazon.com/ec2/pricing/). We recommend using a "medium high-CPU" or "small" instance type, which cost $0.17 and $0.085 per hour, respectively (pricing as of April 2011). Building is a very CPU and memory-intensive task, and on a "medium high-CPU" instance, a full build from clean takes 6 hours to complete.
Amazon also offers a free "micro" tier, but there are a number of restrictions on it, including a very tight 600 MB RAM limit, and a 10 GB EBS disk limit. Open embedded barely fits in a 10GB EBS volume, and in fact will not build from clean in 600 MB of RAM. However, we offer the pre-built image for micro tiers for users who just want to evaluate the solution to see if this is something they want to pay for. On a micro tier you can build a couple small packages and re-create images, sufficient for a quick hack or evaluation, but we do not recommend doing serious development on a micro instance.
Note: "free" micro images have limits on the amount of disk operations and bandwidth you can use before you are automatically charged, and there is no warning for when billing starts. On the other hand, most charges are on the order of pennies per quanta, so you are unlikely to run up a big bill during evaluation.
If you want to build your own OE image entirely from scratch, please see Building OpenEmbedded for instructions on how to do that.
Warning: something that is not obvious is that if you use an "instance" store (/mnt by default), all data on that disk is lost when you reboot the instance. Instance stores are fast and free for access, but ephemeral and unreliable. EBS, which is the mechanism we use to distribute the OE image (mounted on "/" in our instance), is a reliable, permanent medium that is slower, archiveable and costs money to access, but at least you don't lose the data when you reboot.
AMI numbers
The AMI for an EBS image with 30GB of space (enough to build a large number of packages, but not eligible for the free tier) is ami-840871d6.
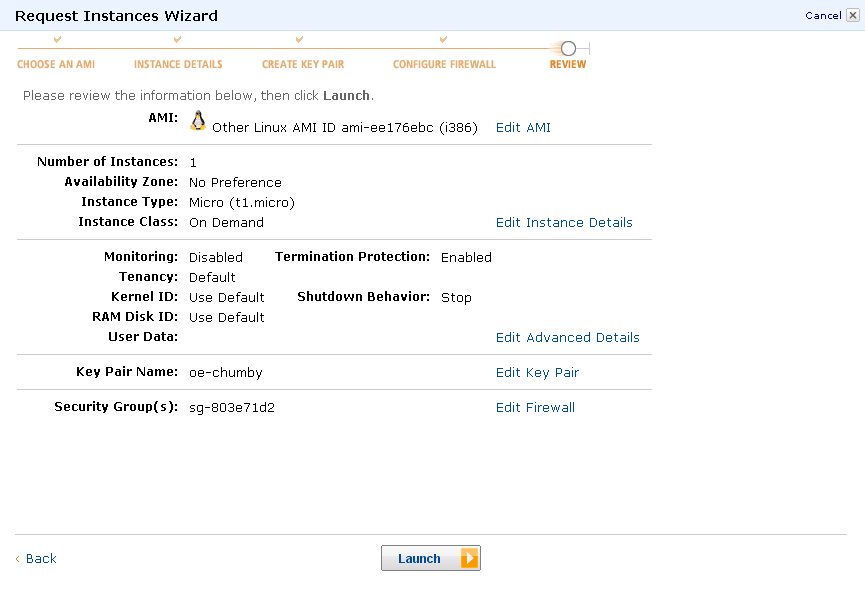
The AMI for an EBS image with 10GB of space (eligible for free tier but not a lot of space to build) is ami-ee176ebc. NOTE: AWS has notified us that we needed to remove the SSH keys on the image to prevent a security breach, so a new AMI should be used: ami-062c5454.
The AMI for an EBS image with 50GB and a very complete, pre-built NeTV image with buildbot and gitweb pre-installed is ami-c0b3f692. We strongly recommend using at least a small instance, if not a medium-sized high-CPU instance, otherwise large builds can take forever.
Note: these AMI numbers are available only in the Singapore availability zone. It is possible to copy the AMI to any availability zone, you do so by creating a snapshot of the image and then creating a new volume in your zone.
How to create an instance
First, register for the Amazon EC2 service (http://aws-portal.amazon.com/gp/aws/developer/subscription/index.html?productCode=AmazonEC2). The process is fairly self-explanatory, and they do require a credit card to register. I believe you can even link this to an existing consumer/personal Amazon account, but we haven't tested this.
You will be asked to make a key pair for yourself, certificates, and so forth; save them, as you will need the key pair to log into your instance.
Once you are approved for an account, you will see a console similar to the following: 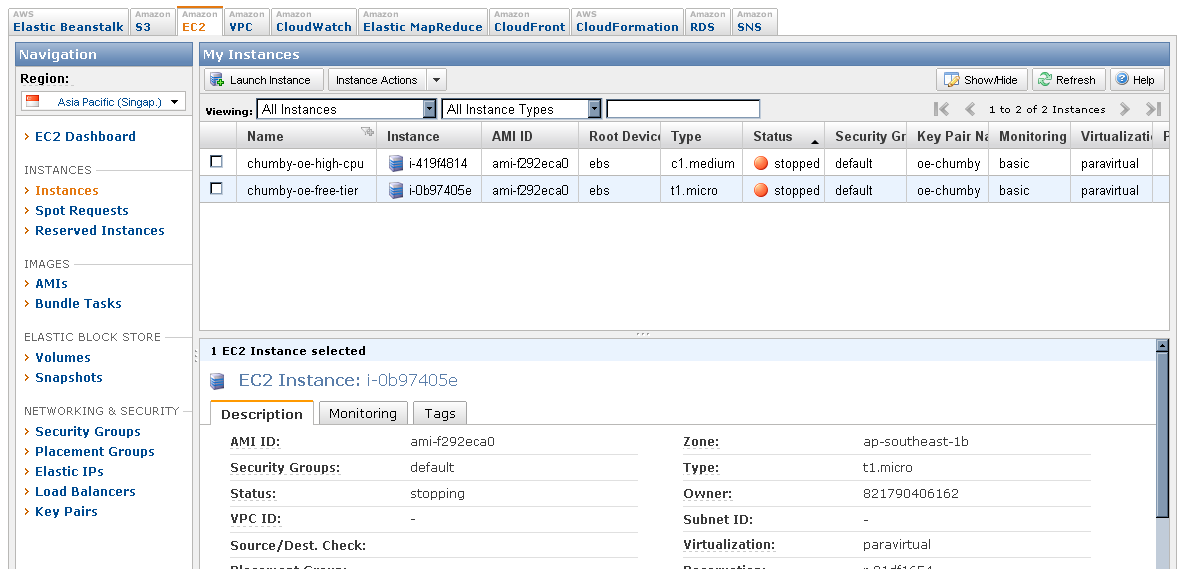
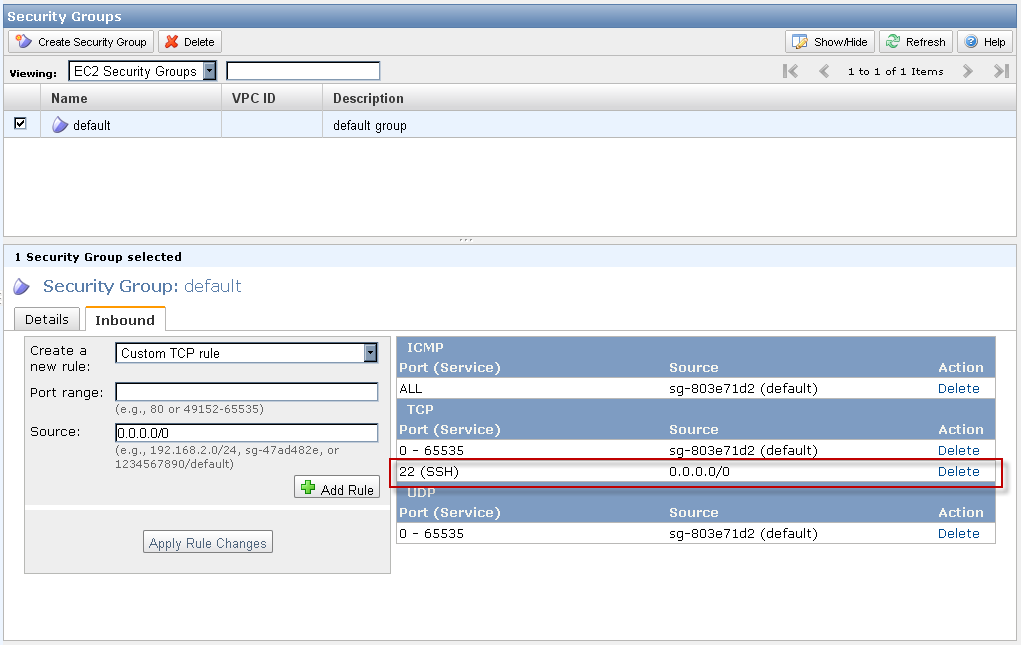
Set security groups
Before moving forward, click on Security Groups and enable ssh. If you are using the NeTV pre-built image, you will also want to enable HTTP (port 80) as well, to access buildbot and gitweb.
Launching an instance
Now, click on Launch Instance, and do the following:
- Click on community AMIs and enter the AMI number. Note that it can take up to a couple of minutes for the community AMI list to load, so be patient -- the UI gives no hint of the loading process, so it's easy to think nothing was found.

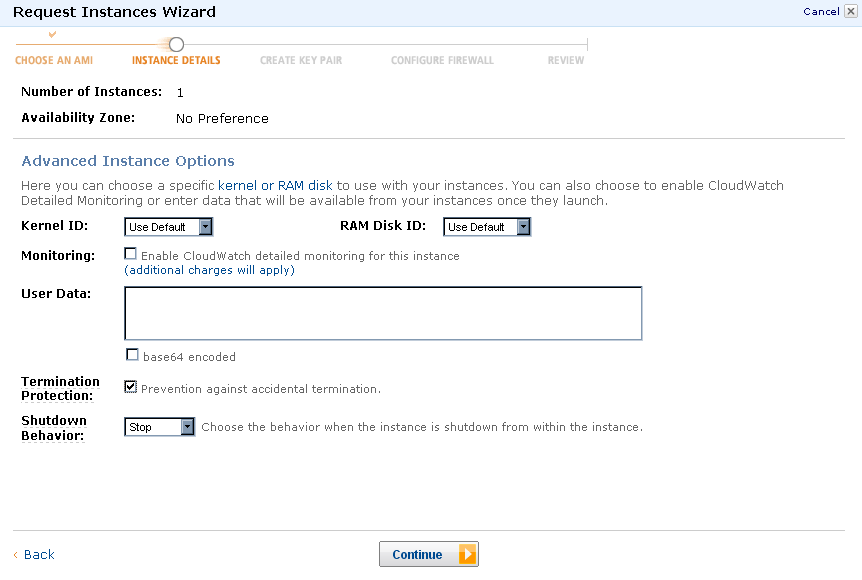
- Select your instance type.

- Configure your instance details. I typically turn on termination protection, but here you can also map a new kernel to the device, if you need to do so. Sometimes I find I have to enter an explicit kernel ID, especially if after you start the instance nothing seems to happen. The default kernel ID is aki-13d5aa41 for both images, in case you need it.
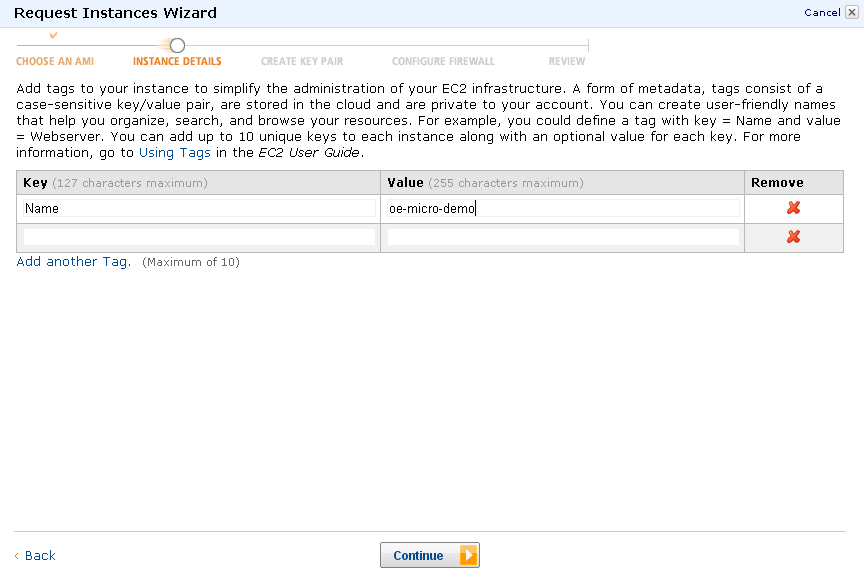
- Give your instance a name.
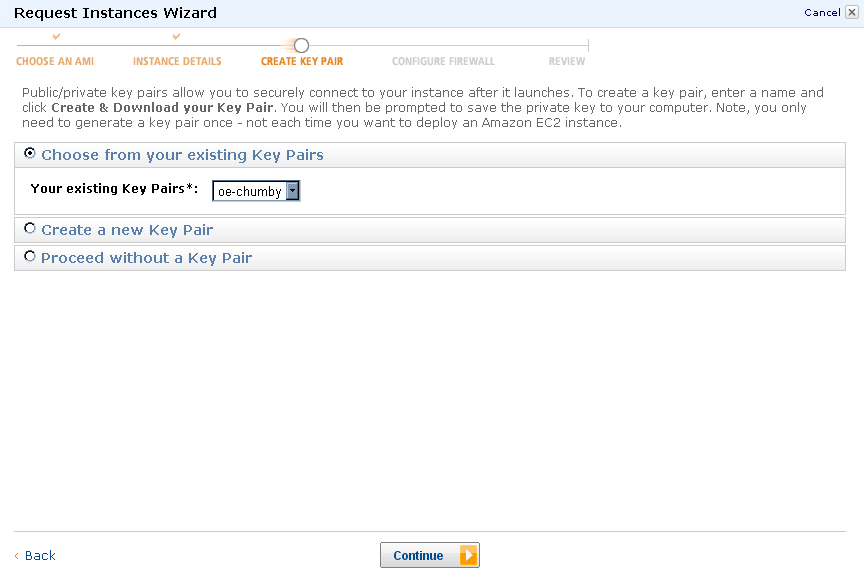
- Pick your key pair. I can't test this theory because I only have one account, but I believe the keypair you generated when you created your amazon account should be usable, and you don't need the keypair that I made with the instance.
- Pick your security group -- default should be okay (assuming you enabled ssh access; your "new" account has all access shut off)
- Launch the instance!
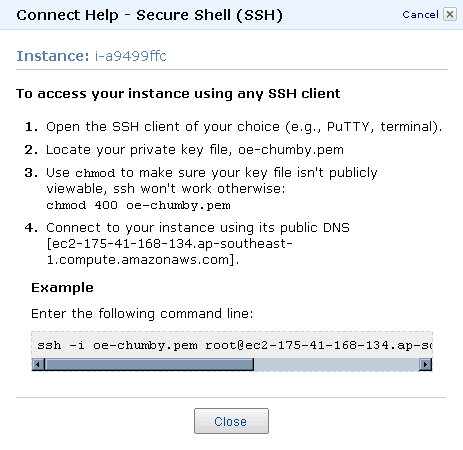
- Go back to the dashboard, and wait until the instance is running. Right click on the instance, and select connect. It will give you detailed instructions on how to connect. Note that the DNS mapping of your instance changes every time you restart it, but you can use elastic IP to make it fixed (at a charge!).
- Finally, log in with the username "ubuntu". No password is needed, since you are already validated through the key pair. "ubuntu" has sudo privileges as well, so protect your keypair!
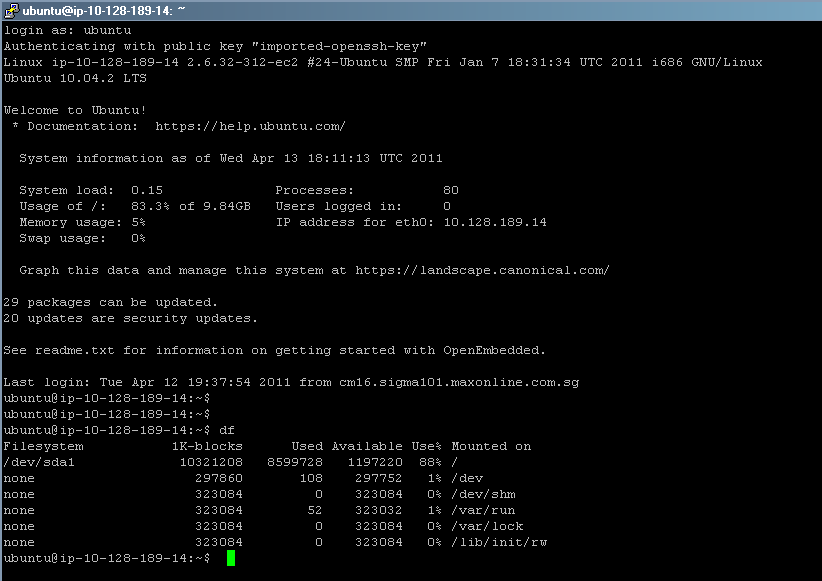
Once you are logged in, there is a readme.txt that will help guide you through the rest.